Hands-On Introduction to Robot Operating System(ROS)

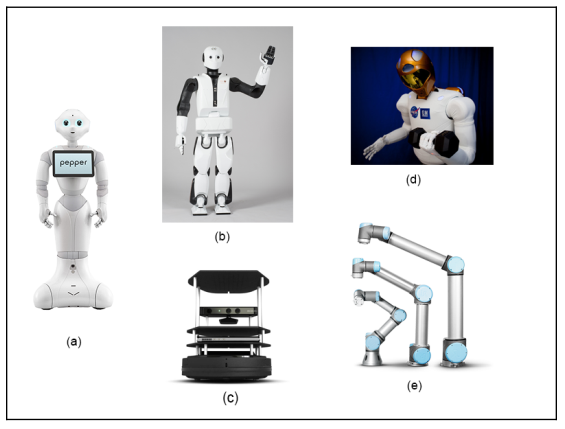
Wikipedia defines Robot as a machine capable of carrying out complex series of actions automatically. The advantages and importance of Robots are contentious, the robotics field is evolving every day and the benefits of robots are becoming inevitable. This article is not meant to discuss the advantages of robots, but to get you started with ROS(Robot Operating System).
This article describes ROS installation, file system, packages, nodes, topics, messages, service, publishers, subscribers, and ROS GUI tools. The programming language used in this article is Python. Refer to this github repo for the codes in this article.
ROS is an open-source meta operating system or a middleware used in programming Robots. It consists of packages, software, building tools for distributed computing, architecture for distributed communication between machines and applications. It also provides tools and libraries for obtaining, building, writing, and running code across multiple computers. It can be programmed using python, c++, and lisp.
ROS vs Framework vs OS(Operating System)
Operating System(OS) manages communication between computer software and hardware. In the process of managing this communication, it allocates resources like the central processing unit(CPU), memory, and storage. Examples are windows, Linux, android, mac OS, etc.
Framework in computer programming is an abstraction in which software providing generic functionality can be selectively changed by additional user-written code, thus providing application-specific software. Software frameworks may include support programs, compilers, code libraries, toolsets, and application programming interfaces(APIs) that bring together all the different components to enable the development of a project or system. Examples are Django, Laravel, Tensorflow, Flutter, etc.
Robot Operating System(ROS) is not a full-fledged operating system, it is a “meta operating system”. It is built on top of a full operating system. It is called an OS because it also provides the services you would expect from an operating system, including hardware abstraction, low-level device control, implementation of commonly-used functionality, message-passing between processes, and package management. It is a series of packages that can be installed on a full operating system like Ubuntu.
ROS level of concepts
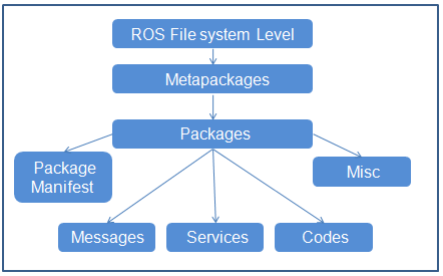
Filesystem level — these are resources located on the disk. For example, packages, package manifests (package.xml), repositories, messages types, service types, etc.
Computation level — these involve the communications between peer to peer networks of ROS. Examples are nodes, master, parameter server, messages, topics, services, bags.
Community level — these involve the exchange of software and knowledge between members of the community. Examples are distributions, repositories, ROS wiki.
catkin is the new build system (generate executable files from source files) for ROS while rosbuild was the build system used in the past. catkin uses CMake more cleanly and only enhances CMake where it falls short on features, while rosbuild uses CMake but invokes it from Makefiles and builds each package separately and in-source. catkin was designed to be more conventional than rosbuild, allowing for better distribution of packages, better cross-compiling support, and better portability.
ROS Distributions, Installation, and File System
ROS distributions are named alphabetically. For instance, the last 3 distributions are Lunar Loggerhead, Melodic Morenia, and Noetic Ninjemys. ROS can be officially built on Linux distributions but it also supports other operating systems. This article uses ROS Melodic distribution on Ubuntu 18 Linux distribution.
You can install other distributions by changing the distribution name. For instance, you can change melodic to noetic but note noetic support Ubuntu Focal Fossa(20.04). This installation installs the full version, you can install smaller versions for instance:
This installation does not contain the GUI tools.
After proper installation, you need to source the ROS setup script. source command reads and executes commands from the file specified as its argument in the current shell environment.
To avoid sourcing the setup file every time a new terminal is opened, you can add the command to the .bashrc file. It will automatically run when you open a new terminal.
Check for proper installation
This command output your ROS distribution
File System
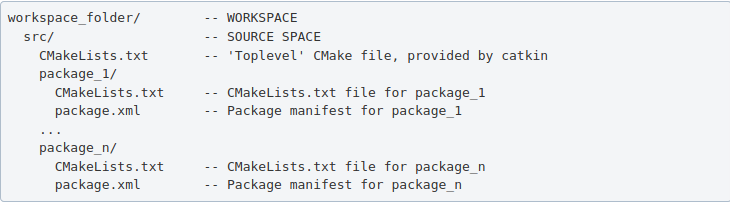
ROS packages are saved in a catkin “workspace” folder. The package folders are saved in the “src” folder in the catkin “workspace”.
The catkin_make command builds all packages located in “catkin_ws/src” folder. After running catkin_make command, two new folders “build” and “devel” will be created. Note, you should always run catkin_make command when you are in the “catkin_ws” directory. The “build” folder is where CMake and Make are invoked, while the “devel” folder contains any generated files and targets, including setup.sh files. A “CMackeLists.txt” file is also created in the src folder(I explained more about this file below).
Ros Package — contains libraries, executables, scripts, and other artifacts for a specific ROS program. Packages are used for structuring specific programs. Files in a package also have a specific structure. A ROS package folder could contain:
- launch folder — it contains the launch files(launch files are used to run multiple nodes).
- src folder — it contains the source files for instance python or c++ files.
- package.xml — also called manifest file, contains package metadata, dependencies, and other metadata related to the package.
- CMakeLists.txt -it contains executables, libraries, etc. it is catkin metapackage.
A ROS package must be in the parent “catkin_ws/src” folder, its folder, and must contain package.xml and CmakeList.txt.
Creating a ros package

This command creates a package called “bio_data_package” with dependencies std_msgs, rospy, and roscpp. This command automatically creates a folder named the package name, this package folder contains the “package.xml”, “CMakeLists.txt”, “include” folder and “src” folder. The “src” folder in the workspace folder is different from the “src” folder created in the package folder. Build all the packages in “catkin/src” by running catkin_make, source the “setup.bash” in the “devel” folder to add new environment variables.
ROS Package command-line tool — rospack
rospack is used to get information about packages. Note: Tab completion, press the tab key once to complete a command, and twice to show you suggestions. For instance, you press tab twice after rospack.

rospack list — list all the ROS packages in your workspace rospack find bio_data_package — to output the path of package “bio_data_package”
The package.xml contains tags that describe the package. The required tags are name, version, description, maintainer and license.
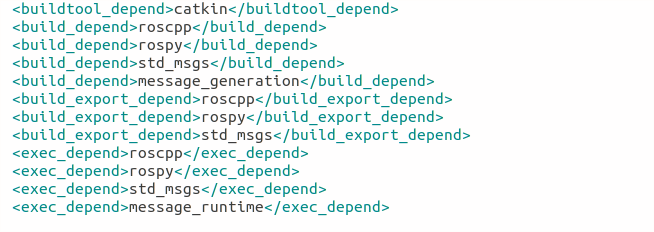
<name>– the name of the package.<version>– the version of the package, usually it should be three integers separated by dots.<description>– a description of the package.<maintainer>– information about the maintainer i.e someone you can contact if you need more information about the package.<license>– the license to the package.<buildtool_depend>(build tool dependency) – the build system required to build the package, this is usually catkin or rosbuild.<build_depend>(build dependency) – the dependencies of the package, each dependency is enclosed in a build_depend tag.<build_export_depend>(build export dependency) – a dependency that is included in the headers in public headers in the package.<exec_depend>(Execution Dependency) – a dependency that is among the shared libraries.<test_depend>(Test Dependency) – a dependency required for unit test.<doc depend>(Documentation Tool Dependency) – a dependency required to generate documentation.
A ROS node is an executable that uses ROS to communicate with other nodes. The concept of ros node helps in fault tolerance as each node does not depend on another node.
- ROS Master — provides naming and registration services to the rest of the nodes in the ROS system. Publishers and Subscribers register to the master, then ROS Master tracks ROS topics being published by the publisher and ROS Topics being subscribed to by the subscribers. It also provides the Parameter Server.
- rosout — rosout is the name of the console log reporting mechanism in ROS. rosout subscribes to /rosout topic.
- Parameter Server — is a shared, multi-variate dictionary that is accessible via network APIs. Nodes use this server to store and retrieve parameters at runtime.
- roscore — master + rosout + parameter server. It controls the entire ROS system. It must be running to enable ROS nodes to communicate. It is a collection of nodes and programs that are pre-requisites of a ROS-based system.

Once roscore is running, you can open a new terminal to run other ros nodes.
ROS node command-line tool — rosnode

ROS Run
rosrun — this is used to run a node in a package
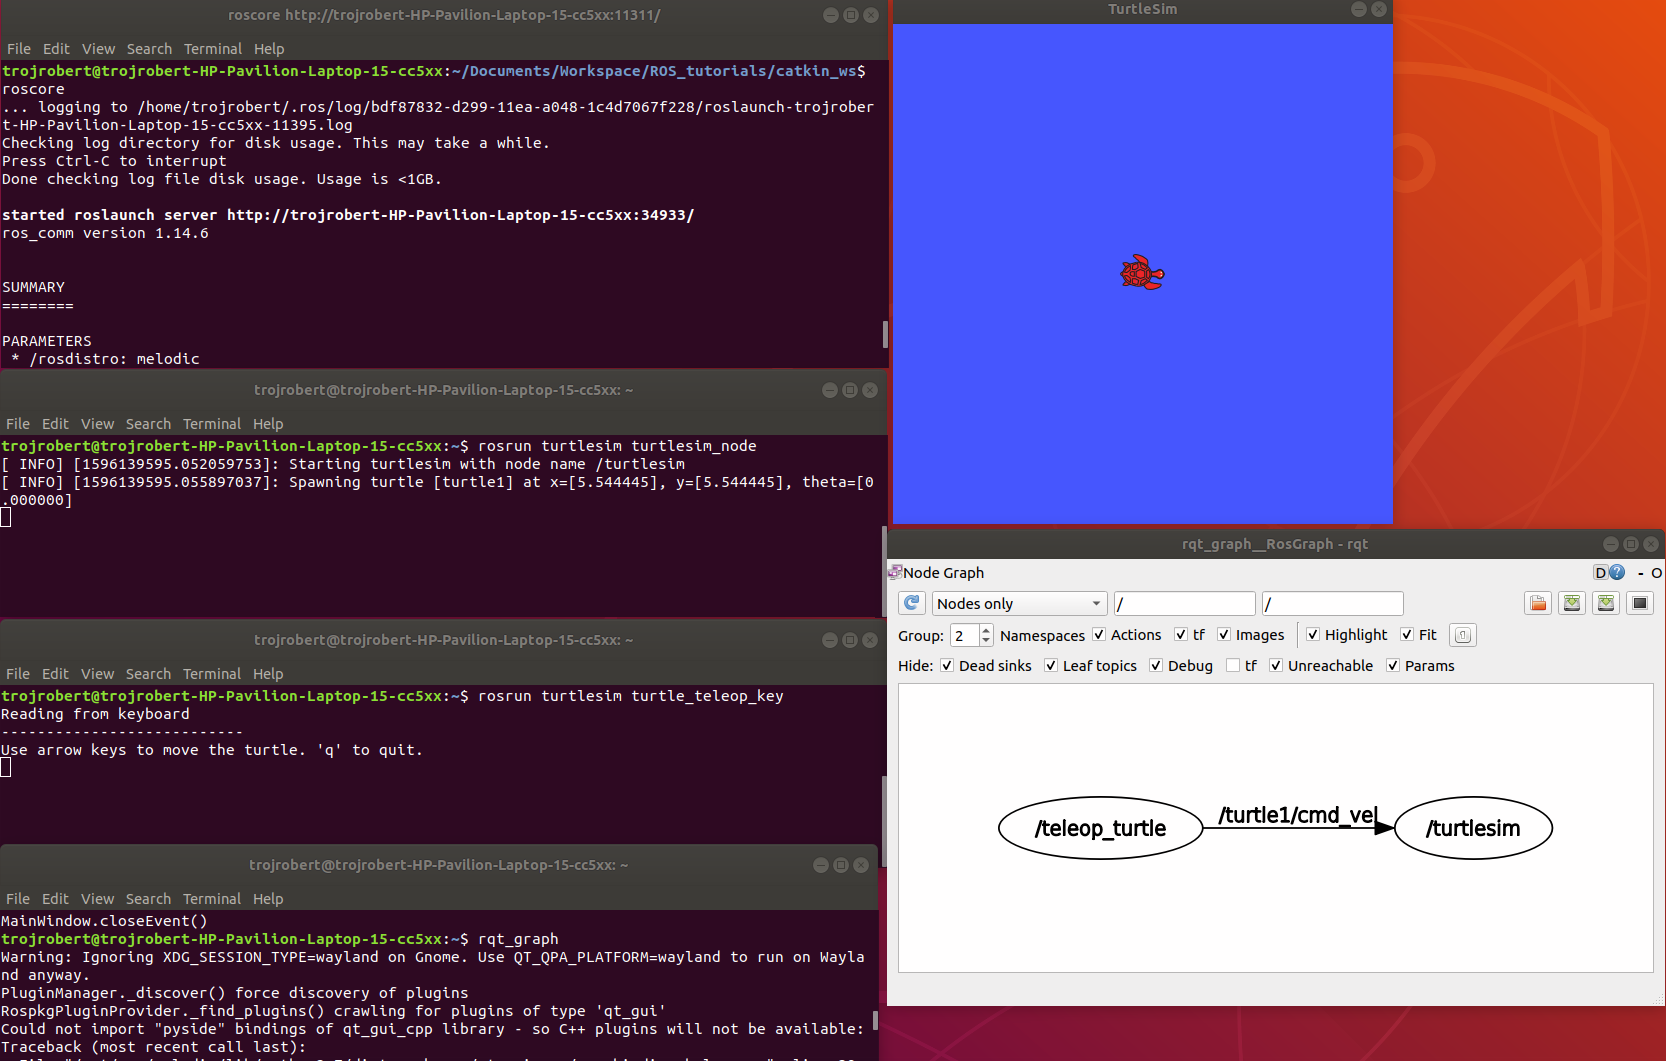
turtlesim_node display a GUI with a turtle.

Run the command on a different terminal
The turtle_teleop_key node provides a way to control the turtle with a keyboard. Click on the terminal where you ran rosrun turtlesim turtle_teleop_key, then press the arrow keys, the turtle moves in the direction of the arrow key pressed.
Ros Topics are the buses used by ROS nodes to exchange messages. Imagine a ROS Topic as a water pipe and ROS Message as the water, the two ends of the pipe are where the nodes are located. Topic transport message between a publisher node and a subscriber node. Ros Topics have anonymous publish/subscribe semantics. Nodes that generate message/ data publish to a specific topic, and nodes that consume or need data subscribed to a specific topic. The relationship between publishers and subscribers is many to many.
In the example above, the turtle_teleop_key node publishes the key pressed to the /turtle/cmd_vel topic and the turtlesim node subscribes to that same topic.
ROS topic command-line tool — rostopic

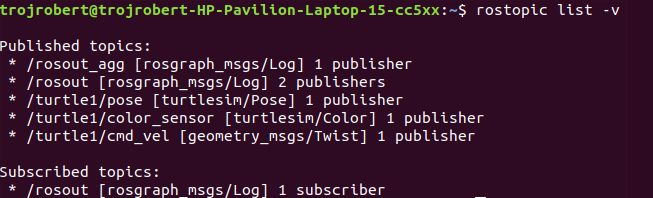
rostopic hz [topic] (shows how fast the messages are publishing) rostopic hz /turtle/cmd_vel
Nodes communicate by sending ROS messages to each other using ROS Topic. A message can be of primitive type integer, floating-point, boolean, etc. A publisher and subscriber should communicate using the same topic type. The topic type is determined by the message type.
Creating a ROS message
Create a msg folder in your package folder. We created a new package call bio_data_package in the example above. Inside this newly created “msg” folder, create a msg file called name.msg
Step 1
Copy the following command into the “name.msg” file. You can also check on github
string first_name string last_name
Step 2
Open the package.xml for the bio_data_package package in a text editor, then modify the tag and the tag by adding. You can also check on [github](https://github.com/trojrobert/introduction-to-ROS/blob/master/sample_package.xml)
<build_depend>message_generation</build_depend> <exec_depend>message_runtime</exec_depend>
Now you should have something like this, please don’t modify other lines.
Step 3
Open the CmakeList.txt file for the bio_data_package package in a text editor. This is needed for steps 3 to 6. Check a sample file on github
Modify the find_package call by adding message generation to its components. Now you should have something similar to this.

Step 4
Modify the catkin_package by adding message_runtine

Step 5
Modify add_message_files by adding the name.msg, this enable CMake to reconfigure the project with the new msg file.

Step 6
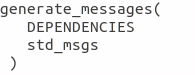
Modify generate_message by removing the # symbols to uncomment it.
Step 7
ROS message command-line tool — rosmsg

Show the description of the new message created

ROS service is one to one two way transport, it is suitable for request/reply interactions. A ROS node(server) offers a service, while another ROS node(client) requests for the service. The server sends a response back to the client. Services are defined using srv files. srv files are just like msg files, except they contain two parts: a request and a response. Services also have types like topics.
Creating a ROS Service
Create a srv folder in your package folder. You created a new package call bio_data_package in the example above. Inside this newly created “srv” folder, create a srv file called full_name.srv. A srv file is used to describe a service, srv files are stored in the “srv” folder.
Copy the following command into the “full_name.srv” file. A sample is on github
string first_name string last_name --- string full_name
A srv file has two parts separated by -, the first part is the request while the second part is the response.
Do the steps required in creating a ROS message, but instead of Step 5, do thhe following. Please don’t repeat all the steps if you have done them before.
Step 5(specific for ROS service)
Modify add_service_files by adding the “full_name.srv”, this enables CMake to reconfigure the project with the new srv file.

ROS service command-line tool — rossrv

Show the description of the new service created
ROS Services vs ROS Topic
Involves the communication between any two nodes
Involves the communication between Publishers and Subscribers
It is a two way transport
It is a one way transport
It is one to one
It is many to many
Involves a request/ reply pattern
Does not involves a Request/reply pattern
ROS Publisher and Subscriber
Publisher and subscriber is many to many but one way transport. A node sends out a message by publishing it to a given topic. The topic is a name that is used to identify the content of the message. A node that is interested in a certain kind of data will subscribe to the appropriate topic.
Creating a Publisher
A publisher is a node that publishes messages into a topic. Create a scripts folder in your package folder, we created a new package call bio_data_package in the example above, inside this newly created “script” created folder, create a python file called writer_pub.py
Copy the following code into the “writer_pub.py” file. Sample is on github
Creating a Subscriber
A subscriber is a node that gets messages from a topic. Create a python file called reader_sub.py in the “scripts” folder.
Copy the following code into the “reader_sub.py” file. A sample is on github
Modify the caktin_install_python() call in CMameLists.txt
catkin_install_python(PROGRAMS scripts/writer_pub.py scripts/reader_sub.py DESTINATION ${CATKIN_PACKAGE_BIN_DESTINATION} )
Build the created publisher and subscriber
Test the Publisher and Subscriber
Terminal 2rosrun bio_data_package writer_pub.py
Terminal 3rosrun bio_data_package reader_sub.py
Terminal 4rosnode list -a

ROS Tools
roswtf is a tool for diagnosing issues with a running ROS file system. It evaluates ROS setup like environment variables, packages , stacks, launch files and configuration issues.

rqt_console is a tool that displays messages being published to rosout. These messages have different level of severity like debug, info, warn, error, fatal.
Terminal 2rosrun turtlesim turtlesim_node
Terminal 3rosrun turtlesim turtle
Now move the turtle to the wall

rqt _graph
This shows nodes and the topics the nodes are communicating on.
rqt _plot
Display the scrolling time plot of data published on a topic

rqt
rqt contain most ROS GUI tools, you can select the on you want in the Plugib tab.

Other ROS concepts
ROS Launch — is used for starting and stopping multiple ros nodes. It is used to execute a ros program which is a .launch file.
ROS Stack — this contain several packages.
rosbag — published topics are saved as .bag file, rosbag command line tool is used to work with bag files.
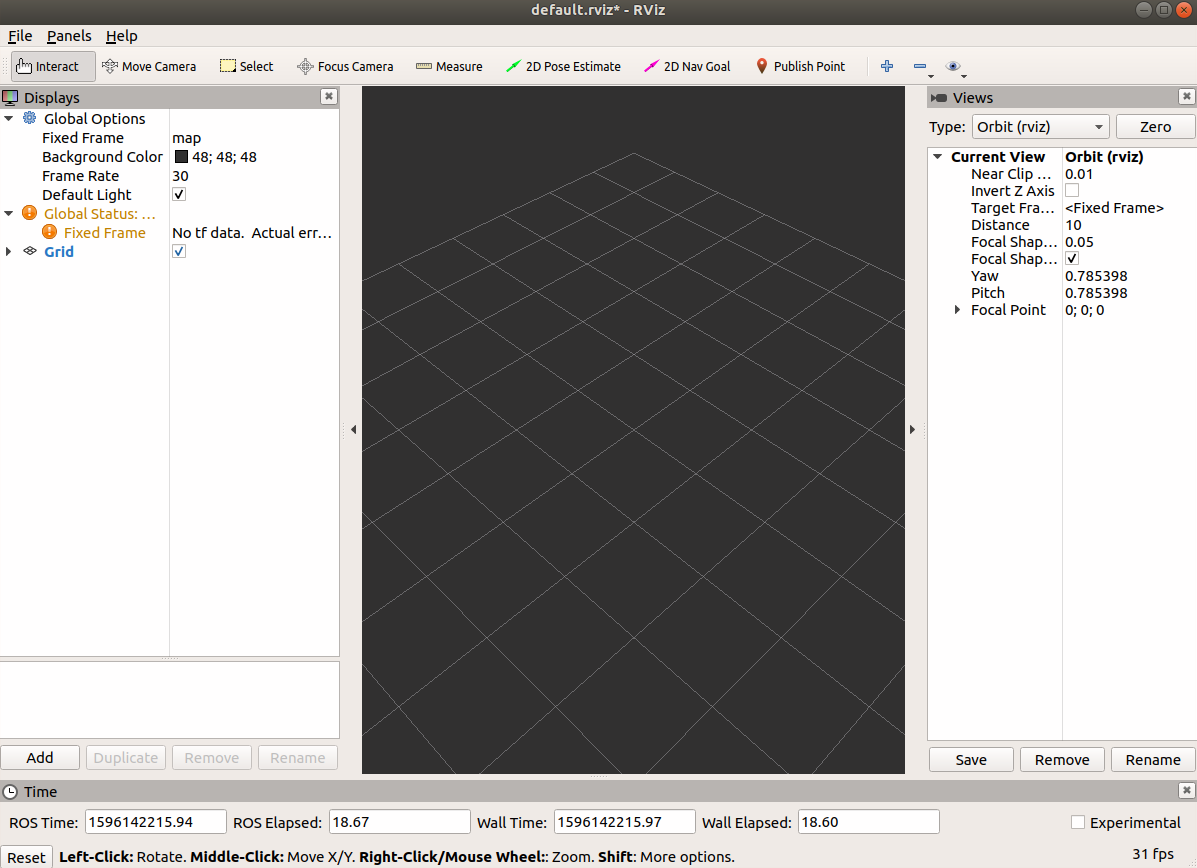
rviz — 3D visualization tool for ROS